Passbook, Transaction, and Document Printers
All Craden Printers Made in the USA
Header Content Region
Insert text, image or banner ads here, or just delete this text and leave this area blank!


Heading 1
This is an example of the content for a specific image in the Nivo slider. Provide a short description of the image here....
Heading 2
This is an example of the content for a specific image in the Nivo slider. Provide a short description of the image here....
Heading 3
This is an example of the content for a specific image in the Nivo slider. Provide a short description of the image here....
Heading 4
This is an example of the content for a specific image in the Nivo slider. Provide a short description of the image here....


Info Left
This is simply dummy text of the printing and typesetting industry. Lorem Ipsum has been the industry's standard dummy text ever since the 1500s.

Info Center
This is simply dummy text of the printing and typesetting industry. Lorem Ipsum has been the industry's standard dummy text ever since the 1500s.

Info Right
This is simply dummy text of the printing and typesetting industry. Lorem Ipsum has been the industry's standard dummy text ever since the 1500s.
Proper Ribbon Shield Installation in DP8 & DP9
Ribbon shield installation is easy, but you have to pay
attention
This instruction also available on video...click here to watch the Craden ribbon shield video on You-Tube
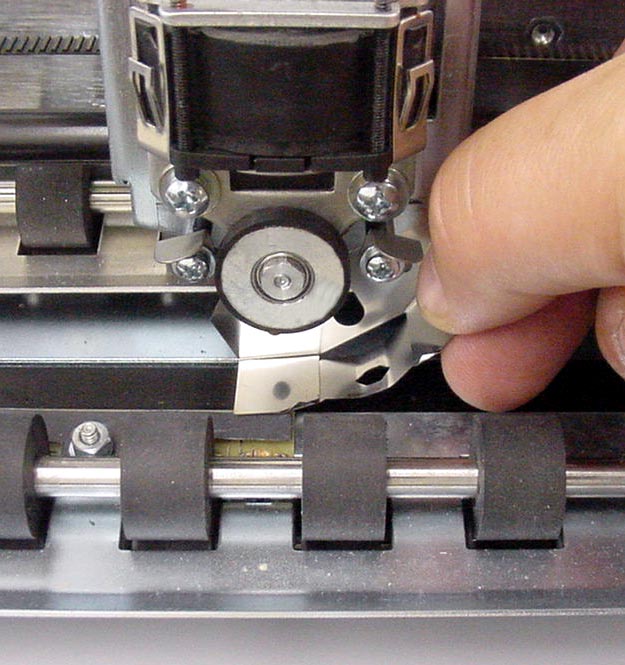
Ribbon shields keep copy streak free. They can, however, cause problems if they are worn or bent during installation. The DP8 and DP9 were designed to leave the ribbon shield in the printer while ribbons are replaced. If you need to remove a ribbon shield, pull it out to the right as shown below.
|
|
|
|
|
After raising carriage with the lifter ring, center the carriage and pull the ribbon shield down and out to the right.
|
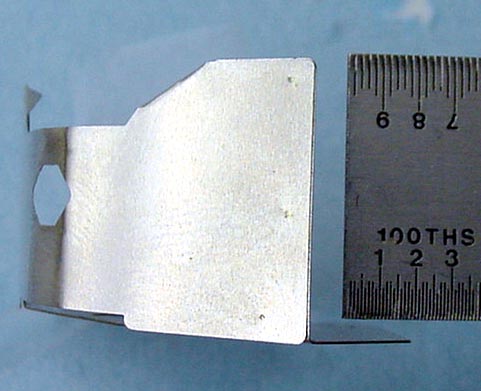
Before reinstalling shield, check that the shield face is perpendicular to the shield base or back
|
|
|
|
|
|
|
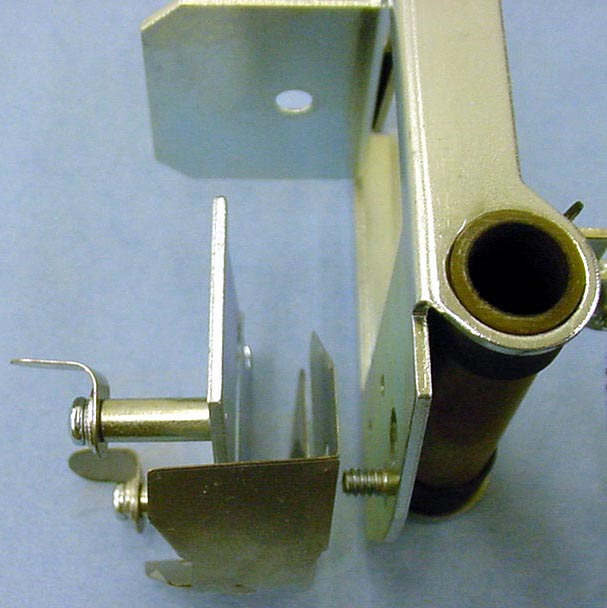
Exploded diagram. Shield rests between ribbon guide plate and carriage.
|
Shield is inserted carefully behind ribbon guide plate and in front of carriage
|
|
|
|
|
|
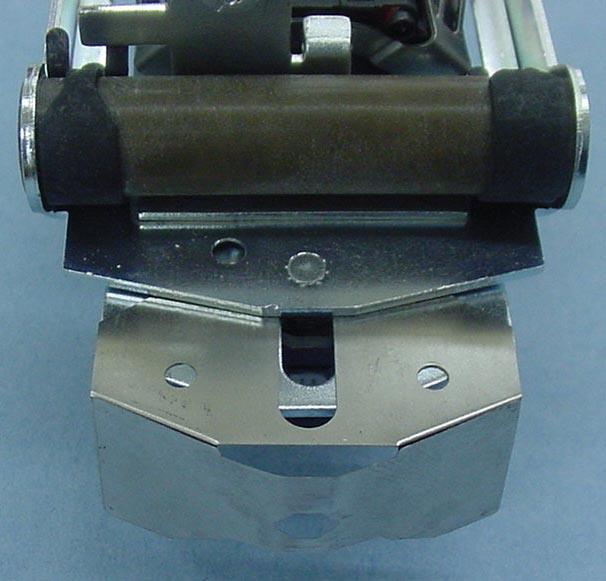
|
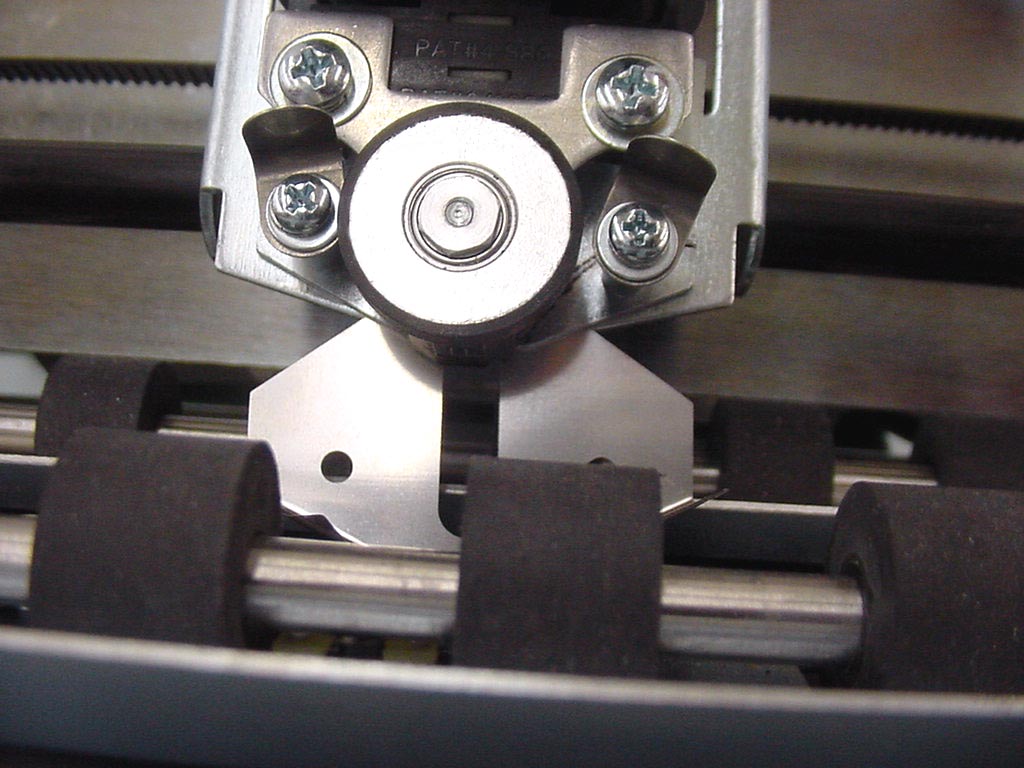
Carriage assy. removed from machine for clarity. Shield inserted correctly between ribbon guide plate and carriage
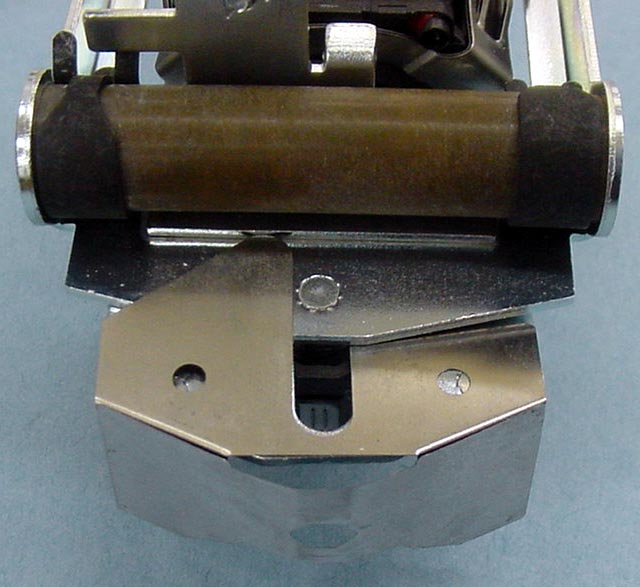
|
Carriage assy. removed from machine for clarity. Shield inserted INCORRECTLY. Half behind carriage. When lifter ring is raised shield will be bent irreparably.
|
|
|
|
|
|
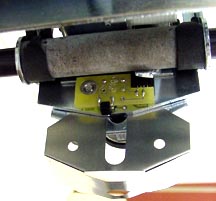
|
Different view: Carriage assy. removed from machine for clarity. Shield inserted correctly between ribbon guide plate and carriage
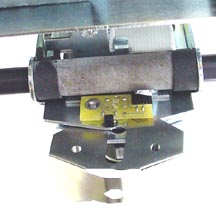
|
Different view: Carriage assy. removed from machine for clarity. Shield inserted INCORRECTLY. Half behind carriage. When lifter ring is raised shield will be bent irreparably. |